Using AI to add color to monochrome manga creates a rendered interpretation of finished black-and-white art. The source still contains artistic decisions that color must respect: ink weight, screentone, panel rhythm, balloon space, and focal contrast. Source preparation and review determine whether the result remains usable as manga.
Short answer
Use the cleanest owned source, preserve the original separately, and test a page that includes both open shapes and detailed screentone. Review line art and lettering before palette. If automatic color treats tone as texture, fills a bubble, or changes the drawing, fix the source or color that area manually.
A five-step workflow
1. Keep the monochrome master
Work from a copy and leave the original project untouched. Flatten only the file you plan to upload, not the production document that holds line art, tones, lettering, and guides.
This creates a reliable comparison and lets you rebuild the color pass if the exported source was cropped, compressed, or cleaned too aggressively.
2. Clean scanning defects, not drawing decisions
Remove paper shadows, page-edge dirt, accidental rotation, and compression blocks. Keep intentional screentone, hatching, speed lines, and hand-drawn effects.
If the source comes from an editable project, export at a consistent size instead of enlarging a small raster scan after the fact.
3. Choose a useful color reference
Define a few anchor colors for recurring hair, skin, clothing, and props. References should guide identity while leaving light and mood open to the scene.
Do not mistake a reference palette for a guarantee. Automated interpretation can still vary, so compare repeated elements across pages.
4. Inspect tone and lettering
Screentone may be read as surface texture, shadow, or noise. Check whether the color pass keeps the intended depth instead of painting every dot pattern literally.
Inspect balloon interiors, tails, captions, and sound effects separately. Text contamination is a reject condition even when the character color looks good.
5. Return to an editable workflow
Download the accepted rendered image and place it above or below the source layers in your art software. Use masks and selections to correct local color while preserving the original ink.
For final publication, compare at full resolution and at the size readers will see. Mobile review often reveals muddy text and weak focal contrast.
Decision table
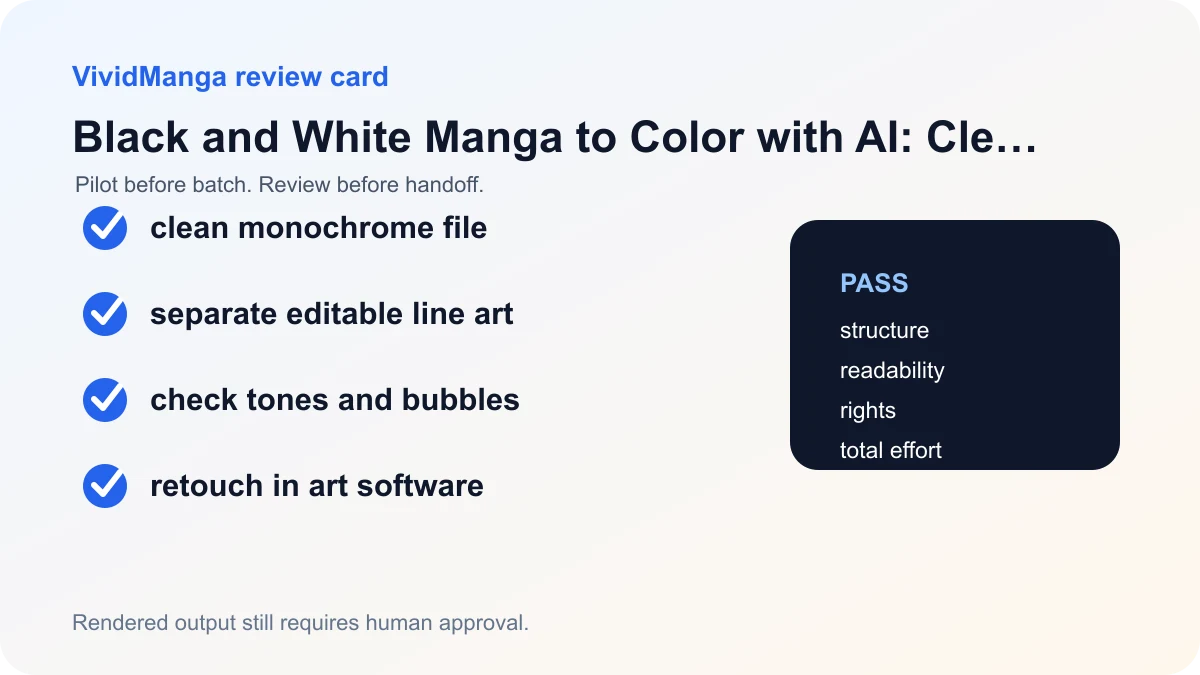
| Check | Pass condition | If it fails |
|---|---|---|
| Scan | No shadows, rotation, or compression blocks | Re-export or clean the copy |
| Ink | Contours and effects match the master | Reject structural changes |
| Tone | Shading reads as intended | Mask or recolor manually |
| Text | All lettering stays legible | Repair before publication |
Choose export settings from the destination backward
Export from the original art project when possible. Keep the source at its native pixel dimensions and avoid enlarging a compressed web copy. PNG is the safest default for line art with sharp edges and text. A high-quality JPG can be acceptable for a scanned page when file size matters, but repeated JPG saves add ringing around ink. WebP is supported, yet the working master should stay in the format used by the drawing application.
There is no single correct DPI without a physical print size. For print, follow the publisher's trim size, bleed, color profile, and effective resolution requirements. For screen reading, judge the actual pixel dimensions and the final display width. If the project uses Clip Studio Paint, keep line art on a reference layer and preserve flats, tones, and lettering separately. The reference layer documentation explains how fill and selection tools can refer to line art without merging it into the color layer.
Use RGB for the automated pass unless the production specification requires a different handoff. Convert to the printer's requested profile at the controlled prepress stage, not through an undocumented browser transformation. Keep an 8-bit rendered copy for ordinary web delivery; retain the original layered document if the studio uses higher bit depth for painting or grading. These are workflow choices, not VividManga output guarantees.
Decide what to do from the source condition
| Source condition | Best next action |
|---|---|
| Clean digital ink and separate lettering | Export a copy at native size and test directly |
| Flat scan with paper shadow or rotation | Correct the scan copy, then compare against the untouched master |
| Heavy screentone and fine hatching | Test a crop first; keep tone if it carries value or texture |
| Small compressed web image | Find the original or accept reference-only use |
| Broken balloons, cropped borders, or missing art | Repair the source before any color test |
Do not erase screentone merely because a result interprets it poorly. First decide whether it represents shadow, material, atmosphere, or a printing texture. If the meaning matters, mask the region in the layered project after the rendered pass. Place the render on a layer below clean ink, align it to the canvas, add a mask, and reveal only the useful color. For a beginner workflow, this can be as simple as keeping the original ink layer on top in Multiply mode and masking color away from bubbles. A production file may require separate flats and correction layers.
A correction walkthrough
Suppose a night page keeps the face and coat contours but paints screentone inside a speech bubble and turns a window hatch into blue texture. Reject the bubble immediately. In the layered master, select the balloon from the line-art reference and mask the render back to white. For the window, compare the monochrome value pattern with the intended material. If it is shadow, repaint a restrained color beneath the ink; if it is printed texture, keep the tone visible rather than replacing every dot.
Review again at 100 percent and at the expected phone width. Record that the output needed bubble masking and one local material correction. That is useful evidence for the next source page. It is not evidence that every page with screentone will behave the same.
VividManga returns a rendered image, not a layered working file. Keep the monochrome master, and upload only art you own or are authorized to process. The Privacy Policy and Terms of Service describe current storage, processing, permission, and output limitations.
Test your manga color direction
Upload one page, compare the before and after result, then batch your chapter when the style is ready.
PNG, JPG, or WebP under 5 MB works best.
Use this result to judge palette, line art, and speech bubbles before scaling.
Test a prepared copy in the Manga Colorizer. For a difficult crop, use the panel guide before committing the full page.
Preserve line weight during cleanup
Threshold and denoise tools can make a scan look cleaner while quietly closing eyelashes, filling hatch gaps, or thinning speed lines. Compare the cleaned copy with the master using a difference view or rapid layer toggle. Clean isolated dust and page shadows first. If a global adjustment changes intentional marks, back it off and use local masks.
Lettering deserves its own export check. Raster text that is already soft will become harder to judge after another resize. When the original project has live text, keep it in the master and consider exporting the color candidate without final lettering, then restore the approved text in the layered file. If the upload must include lettering to test balloon protection, verify every glyph and effect after the result returns.
Compression artifacts often appear as pale blocks beside black ink. They can be mistaken for tone or surface detail. Finding a less compressed source is usually better than sharpening the artifact. When no better source exists, restrict the result to concept or reference use and write that limitation into the handoff. A clean workflow describes the source weakness instead of presenting the color pass as a restoration.
Keep value structure visible
Color should not erase the monochrome page's focal hierarchy. Convert the reviewed result temporarily to grayscale and compare major light and dark groups with the source. The values need not match exactly, but a background that becomes as strong as the face can change the reading order. Correct the color layer or reduce background contrast while keeping the original ink intact.
Use this grayscale check after local masks, because a technically clean bubble repair can still leave the page visually flat. Save the reviewed color candidate and the corrected layered master as different files so the team knows which changes came from the automated pass and which came from the artist.
References used for this guide
- Clip Studio Paint reference layer guide: Reference layers let fill and selection tools use separate line art as a boundary, which is why clean separation makes manual correction easier.
- Clip Studio Paint Smart Tools guide: Clip Studio Paint describes automatic colorization as a server processed preview that creates a raster color result and still benefits from a hint layer and review.
The linked Clip Studio Paint manuals support the described reference-layer and raster colorization mechanics. Export choices and the source-condition table are editorial production guidance, not vendor guarantees.
FAQ
Should I remove screentone before AI colorization?
Not automatically. Screentone is part of the drawing and may carry value, texture, or mood. Test how the color pass interprets it, then decide whether a copy needs selective cleanup.
What resolution should I use?
Use the cleanest practical export from the original project and avoid enlarging a compressed web image. The right size depends on your production and publication target, so compare the output at final reading size.
Will the result contain editable layers?
No. The current result is a rendered image. Keep the monochrome master and its editable layers in your drawing software for corrections and final delivery.
Can I color someone else's manga?
Only with the rights or permission needed for processing and the intended use. Owning a physical copy, subscribing to a service, or finding an image online does not by itself grant adaptation rights.